Every time
someone is about to have a birthday I find myself planning excitedly everything
from the shape and size of the cake to the flavours and ingredients I want to
incorporate. Lately I've been returning to this recipe again and again because
it's easy to make yet looks quite festive and pleases many different tastes.
You will need:
For the
cake (16 cm Ø tin):
4 eggs,
separated
4 tbsp
flour
4 tbsp
sugar
1 package
vanilla sugar
2 tbsp
grated chocolate
3 tsp cocoa
powder
For the
filling:
250 ml
whipping cream
250 g
mascarpone
200 g sour
cream
2 tbsp
sugar
2 gelatine sheets
1 package
vanilla sugar
For
assembling the cake:
a large jar
of sour cherries, drained (save the syrup)
2 tbsp
amaretto
2 tbsp
grated chocolate
Make the cake:
In a bowl
beat the egg whites with an electric mixer until they form stiff peaks. In a
larger bowl, mix the egg yolks with sugar and vanilla sugar, and beat that,
too, until the mixture is pale and fluffy.


Sift the
flour into the bowl with egg yolks and add the egg whites, then fold everything
together gently with a spatula. Add the grated chocolate and cocoa powder and
fold them in, too.


Pour the
mixture in a tin, lined with parchment paper. Bake at 200°C for 25 to 30 minutes.
Once you
take it out of the oven, let it cool down. Then remove it from the tin and even
out the top if necessary before you cut it in three equally thick layers.


Make the
filling:
Whip the
cream with the sugar and vanilla sugar, then add the mascarpone and sour cream.
Melt the gelatine and pour it into the mixture while beating it with an
electric mixer.
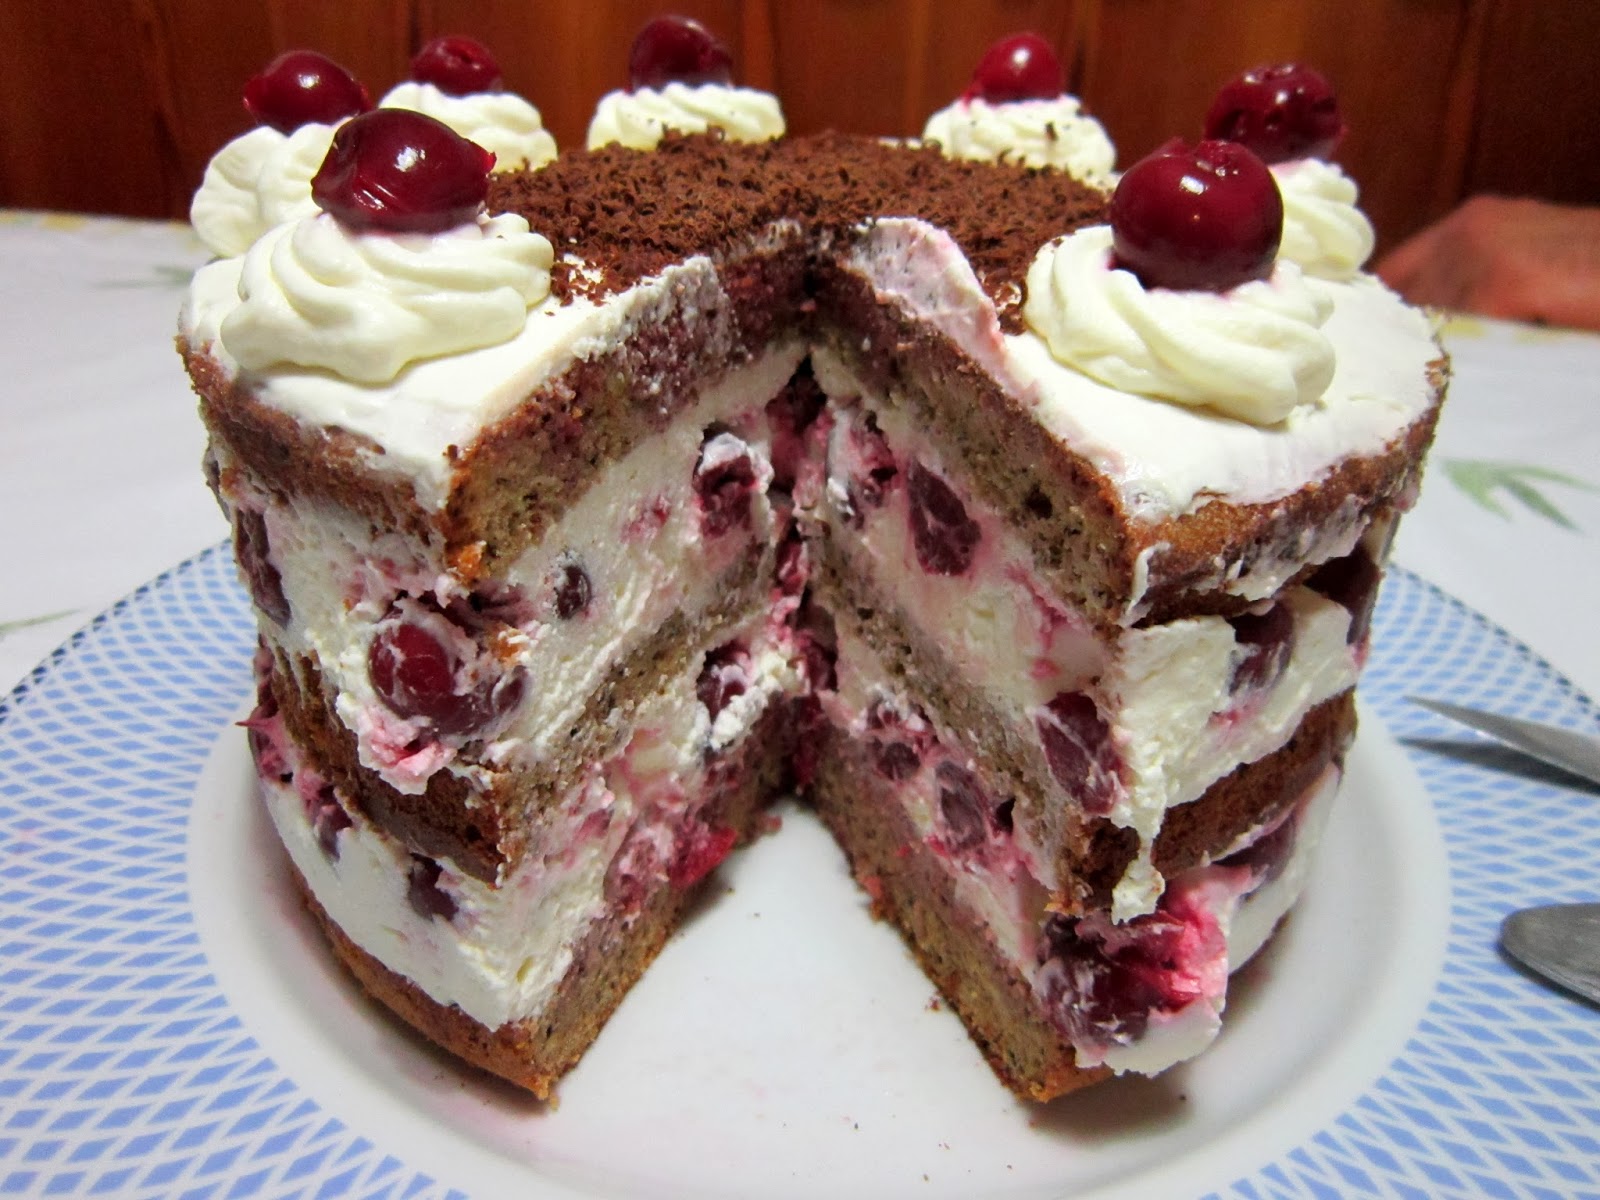
Assemble the cake:
Place the
cake ring on your serving plate. Start with the first cake layer. Moisten it
with a few tablespoons of sour cherry juice and amaretto mixture, and then cover
it with the filling. Place the sour cherries on top and press them into the
filling. Then repeat the process until you reach the last layer of cake.
Save a
couple of sour cherries if you plan on using them on top of your cake as
decoration.
 |
| I "accidentaly" put in "a little" more amaretto than I initially planned. And it turned out just fine. |

 |
Keep in mind that the cherries on the outer edge
are the ones you will see once you remove the cake
ring so you might want to spend an extra
minute arranging them evenly along the edge.
|

Cover the top with a thin layer of filling. Remove the cake ring. You should still have enough filling left to cover the sides of the cake too, if you wish. I, however, was very excited about using a cake ring for the first time, so I skipped this step (although my layers were not the perfection I was going for; I will need to refine my technique in the future).

Put the
rest of the filling in a piping bag and decorate the top any way you like. Top
with sour cherries and finish off with some grated
chocolate.
Refrigerate
for a few hours before serving.


